Showing posts with label recipe. Show all posts

Thursday, December 3, 2015

Easiest cranberry sauce recipe with no added sugar

Ever since we lived in the USA my family has loved cranberry sauce and have it on our Christmas menu every year. We used to make it with a huge amount of sugar but these days we don´t eat refined sugar anymore. So I made a new great recipe. This cranberry sauce is easy to make, using just fresh cranberries, apples, cinnamon and vanilla. The later two will trick you into thinking you're eating something sweeter than you actually are.
The only downside this sauce might have for you is that the color isn´t as bright red but more pinkish.


Cranberry sauce with no added sugar


1 bag (375 grams, about 2 cups) fresh or frozen cranberries
5 jonagold apples
1 large cinnamon stick
2 vanilla beans
optional: a twig of thyme

Wash the cranberries and put them in a large pan.
Add water to the cranberries until they are just about under.
Peel and cut the apples in small pieces.
Add the apples to the cranberries.
Cut the vanilla beans in half lengthwise.
Add vanilla, cinnamon and thyme if using to the cranberries.

Heat the cranberries until boiling.
Reduce heat to low and let boil for 10-15 minutes.

Remove thyme, vanilla bean and cinnamon stick.
Mash the cranberries and apples together.

All done!

If you find the cranberry sauce to still be too sour, you can add a tablespoon of sweetener of choice. I recommend either agave or maple syrup.

If you are not eating the sauce immediately, pour into (sterilized) glass jar and add the cinnamon stick again.

Is cranberry sauce a tradition at your house too? How do you like to make it?


Monday, November 23, 2015

Marzipan recipe with agave

Who doesn't love marzipan?!! Sinterklaas (Saint Nicolas) is back in the Netherlands so it's time for sweets, sweets and more sweets. Marzipan usually comes in sausage form, or as figurines. I made this one as a roll covered in chocolate. It's gone before anyone saw what it was anyway! It took me a little while to get a sweetener that gave the marzipan the right taste. I see a lot of recipes for marzipan with honey but I think the honey has too much of a distinguished taste to use in this case. I have found that agave is the best replacement for white sugar when taste is an issue.

Easy to make, easy to eat!

Marzipan with agave

Makes me want to stop writing this blog and go and make some!

150 grams (1 3/4 cups) almond flour 
100 gram (1/2 cup) light agave syrup
1 teaspoon almond extract
plastic wrap
optional: a bar of good quality dark chocolate and waxed paper

Mix the flour, agave and almond.

Yay you just made marzipan!

Scoop the marzipan onto a piece of plastic wrap. Use the wrap to make a roll, wrap it tightly.
Put the marzipan in the fridge overnight.

Now you can either eat as is, or coat it with chocolate like I did.

To do this put the marzipan in the freezer.
Cut a piece of waxed paper the size of a plate and put it on one.

Melt your bar of chocolate in a bowl over a pan of simmering water. Don't let the bowl touch the water.
Just before it has melted completely, take the bowl off of the pan and let stand on the counter.

Put a piece of waxed paper on a baking tray.
Stir the chocolate gently to see if everything has melted. If not let stand for a few more minutes.
Pour the chocolate onto the baking tray.

Take the marzipan out of the freezer, remove the plastic wrap and push a fork in on either side.
Use the forks to roll the marzipan through the chocolate.
Put the marzipan on your waxed paper covered plate.

Keep the marzipan in the fridge until needed.
Remove it one hour before serving.
Cut in slices with a sharp knife.

Enjoy!


(Note: I'm not sure if agave can be called unrefined or natural as it's not found quite like this in nature but goes through a process. A look on the web gives lots of contradictory articles about the (un)healthy aspects of agave. As far as I can tell agave is high in fructose, low in glucose. This makes it low on the Glycemic Index, meaning it doesn't spike your blood sugar levels. However it does have effects on blood sugar and insulin levels in the long term. Also some agave nectar or syrup is made by a chemical process. This doesn't make it any healthier. Always read the back of the packaging to be sure. 
My opinion: Don't use agave on a daily basis or often in large quantities. Remember that every sugar is crap for your body. Try not to eat too much of it, enjoy it intensely when you do and eat more vegetables!)

Any thoughts on agave? Do you use it?


Sunday, October 18, 2015

Amaranth pancake recipe, gluten free, no sugar, no dairy, candida diet approved

This is an awesome pancake recipe, gluten free, sugar free, lactose free (optional), candida diet approved and really yummy. Combine with veggies and eggs and you have a great dinner!

Last Saturday I took a small course in food photography. It was really fun and useful. Sadly I couldn't use the tips right away which means you still have to do with the awful pictures seen below, giggle.

I also started the Candida diet about a month ago. I did the no sugar, no lactose, no gluten, no carbs.... The first week I was ok, the second week I felt like throwing everything within reach against the wall (except my kids of course, they kept me sane enough to function), and the third week I was feeling so much better that I started eating normally again. I still eat a lot of veggies and try to keep the sugar to a minimum. 
So hereby a nice healthy candida diet recipe. The pancakes have a nice nutty taste and work really well with veggies and eggs. No need for maple syrup on these :)

Amaranth pancakes with veggies and eggs

(Makes about 8 pancakes)
The steam coming off the food made the picture blurry... 
I love my coffee grinder, so versatile
Amaranth flour
First we need amaranth flour. This is easily made with a coffee grinder. I use a Krups Spice and Coffee grinder. Works really well and doesn't cost much, just 17 dollar! One tip: buy a little brush to get everything out.
 Just a few seconds of grinding is enough to turn the amaranth into flour. The amaranth that didn't get chopped will make for a nice crunch in your pancake!

Pancake ingredients

1 cup amaranth flour
1 cup buttermilk or almond milk (other milk is fine too)
1 egg
1/2 teaspoon baking soda when using buttermilk or 1 teaspoon baking powder for other types of milk


Mix baking soda/baking powder with flour. Add milk and egg, mix well. 
The batter will be quite thick but don't be tempted to add a lot of water. One or two tablespoons of water will make it a little bit more fluid without it getting impossible to flip the pancakes.

Bake small pancakes, add some (green) veggies (I used zucchini, broccoli and some carrots) and some scrambled eggs. 

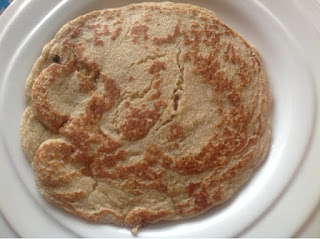
Looks just like a normal pancake :)

My kids loved this!

Looking for more pancake inspiration? How about these Healthy American pancakes or these classic Dutch pancakes.

Have you cooked with amaranth before? Any other good recipes I should try?

Monday, July 13, 2015

Easy quick healthy ice cream, sugar free, no egg, no dairy

With the first heat wave already behind us, get yourself ready for the next one with this great healthy ice cream recipe. It tastes delicious and with just 2 base ingredients you can make a lot of flavors. It takes about 5 minutes to make with a food processor and can be eaten immediately which is a great plus when you have kids! Of course you can have more ice cream!


I've included three different flavors but you can experiment when you understand the basics.

Healthy ice cream

Chocolate ice cream
Ingredients:
2 ripe bananas
2 tablespoons unsweetened cocoa
1/2 cup frozen blue berries

Forest fruit ice cream
Ingredients:
1 ripe banana
1 tablespoon unsweetened cocoa
250 grams (about 1,5 cups) frozen forest fruit

Mango ice cream
Ingredients:
2 ripe bananas
250 grams (about 1,5 cups) frozen mango pieces

Mix the bananas and cocoa if using, in a food processor until the banana resembles a liquid. 
Add the frozen fruit a handful at a time and mix until completely smooth.
(Be sure to use a device that can handle frozen fruit. I broke my little mixer thing.)

That's it! You can eat your yummy healthy ice cream now!

If you feel your ice cream is too runny, pop it in the freezer for 30 minutes. Give it a good stir and repeat as needed.

Making ice cream really is this easy!

Tips to make your own creations:
-As you can see I use a ripe banana as a base. Be sure to use a ripe but not overripe banana. The taste will be too strong. (Unless of course you want to make banana ice cream, then an overripe banana will be even better)
- Don't use big pieces of frozen fruit unless you are sure your device can handle it. Adding a handful at a time will help small devices handle the stress.
- Experiment by adding pieces of chocolate and nuts. I recommend grinding these down separately and stirring them in at the end.

So what ice cream are you thinking of making? I would love to hear!

Thursday, May 7, 2015

Gluten free chocolate chip cookies, no egg either

These gluten free chewy cookies also contain no egg and very little ingredients. They do not last long in our house and are great for unexpected company because they are so quick and easy to make!

Gluten free chocolate chip cookies

Makes about 12 medium cookies

Ingredients

300 grams (3 cups) almond flour
90 grams (6 tbs) butter, room temperature
5 medjool dates, pitted
4 handfuls of chocolate chips

Preheat the oven to 180 degrees C (350 F)
Put a piece of wax paper on a tray.

Mix flour, butter and dates in a food processor until no big pieces of dates remain.
Add up to 5 tablespoons water, one at a time, until the dough starts to form a ball.
Add the chocolate chips (you can add as little or many as you like which is why I didn't give a clear amount)
Mix the dough by hand until the chips are well spread.

Roll small balls from the dough, about the size of a golf ball.
Put them on the tray, pressing them down to about 1 cm (1/3 inch) thickness.
Keep in mind that these cookies do not spread or rise. What you make on the tray is what they are going to look like after you baked them.

Put the tray in the center of the oven (or if you can't put it in the center because you have a stupid oven just like me, put it above the center, not below).
Bake the cookies for 10 minutes.
Let them cool on the tray.

Try not to burn your tongue! (I always do, they are just too yummy to wait for them to cool!)

Let me know what you think!


Wednesday, February 11, 2015

Healthy apple crumble, no added sugar, no gluten

My toddler is always asking for cookies. No idea why, because we never have any. On those occasions when she gets really pushy, I try to make something yummy and healthy like this apple crumble.
The apples are obviously just apples. The crumble is a bunch of raw super food (at least that is what they are calling it here) tied together with real butter.
It's really good and leftovers are great for breakfast, mixed with some yoghurt.

(Be sure to buy products that are truly gluten free if this is important. Products like oatmeal are of themselves gluten free but the machines they are processed on are often not. Check the package to be sure!)

Healthy apple crumble

Makes 4 to 6 servings

Ingredients

8 or more sweet apples
2 tablespoons cocoa nibs
2 tablespoons hemp seed
2 tablespoons flax seed
5 tablespoons oatmeal
1/2 teaspoon salt
5 gooey dates 
2 to 3 tablespoons butter

Preheat the oven to 190 degrees Celsius (375 fahrenheit)
Take a small baking dish and butter the inside.
Cut the apples into cubes and distribute them over the dish.

Mix the dry ingredients (no dates) in a food processor until it turns into a flour like substance.
Put the dates in and mix well.
Add the butter until it just starts to clump.

Mix the crumble by hand until you have nice size clumps.
Distribute the crumble over the apples.
Bake for 20 minutes then add a loosely tented foil over the top.
Bake for another 40 minutes or until apples are soft and just a bit mushy.


Tuesday, January 13, 2015

Dutch split pea soup recipe also called snert

Snert is a split pea soup closely linked to weather conditions. We eat the soup when it's 'snert weather' usually meaning wintry cold and wet either in the form of snow or in most cases rain. When iceskating in the Netherlands, snert is never far away (look for Koek-en-Zopie stalls on or near the ice).
The soup is very thick and best made in large quantities the day before you plan to eat it. As the soup pan can be quite big, put a lid on it and keep it in the shed or garage (assuming that it's cold of course).

It takes a while to make but not much effort. Give it a try, it's really good!

Dutch split pea soup

Makes enough for at least 6 people,
if that's too much you can easily half the recipe

Snert! One of the thickest soups you'll ever eat.


Ingredients:
900 grams (4 cups) split peas
2 medium sized leeks
2 medium onions
2 wintercarrots (at least that is what they are called here, it's the thick dense type)
1/2 celeriac
5 stems of celery leaves
2 laurel leaves
1 kilo (about 2 pounds) pork belly
2 smoked sausages 
salt and pepper


Put four liters (a gallon) of water in a large soup pan. Add the pork belly and pour the peas on top of it. Also add the laurel leaves. Bring to a boil.

After about ten minutes of boiling on medium heat, scoop the froth off.
Boil on the lowest heat possible for an hour. Give it a good stir once in a while.

In the meantime, roughly cut the leeks, onions, carrots, celeriac and celery.

After the hour remove the pork and cut into cubes. Also remove the laurel leaves.
Add the pork and vegetables and cook the soup another 30 minutes. Stir sporadically.

Season the soup with pepper and salt (unless the pork belly was salted, then do not add any more).
Slice the smoked sausages and add to the soup 5 minutes before the timer goes off.

Leave the soup to settle overnight. If your wooden spoon can stand upright in it the next morning, you did it perfectly! :)

Serve hot with rye bread topped with smoked bacon or cheese.

The soup will keep in the fridge for a couple of days but you can also freeze it really well.

Enjoy!


Friday, March 28, 2014

Healthy American Breakfast Pancakes recipe

It has been too busy lately. I am behind on everything. I have a memory game tutorial lined up, a quick and easy petticoat skirt tutorial in the making and a bunch of recipes to share. But as none of those are finished (sorry!) I thought I would share my healthy morning pancake recipe.

This is healthy between quotations because pancakes have never been very unhealthy. It's those cups of maple syrup, butter and what else you pour over them or serve with them that makes in not so healthy. But this is definitely a healthier variant containing less gluten, more fiber and you can even add fruit or vegs if you like. The taste will still be great! O and no baking soda, or powder but a neat little trick I learned last week!

Healthy American Breakfast Pancakes
In our case it was enough to feed 2 adults and a toddler (makes about 15 American sized pancakes)

1 cup of (spelt) flour (you can use any other gluten flour you like but I recommend a whole wheat type)
1/2 cup rolled oats (nothing added, just the basic rolled oats)
1/2 cup buckwheat flour
pinch of salt

1 cup milk or milk substitute like rice milk
1/2 cup yoghurt
2 eggs
optional: 1 grated piece of fruit, like apple or pear, or a handful of blueberries, or grated vegetables like zucchini

1/2 cup sparkling water


Mix the flours, oats and salt in a large bowl.
Add the milk, stir well.
Next add the yoghurt and eggs. Fully incorporate everything.
Add the fruit or vegs if using, stir in gently.

Heat the pan or whatever you are using to bake the pancakes.
Add rice oil/ coconut oil or butter.

Lastly add the sparkling water to the batter. Stir gently until well mixed.

Spoon three batches of batter into the pan at a time. Bake on medium high heat until golden brown on the bottom and then flip and do the same for the other side.

You can keep the pancakes warm in the oven or on a plate over a pan of boiling water.
However if you aren't making too many as is the case with this recipe, you can easily stack them on a plate and cover them with a lid. They will still be hot when serving.

Serve with bacon, eggs and hashbrowns for that all American Breakfast type plate. Otherwise just eat with maple syrup, honey, cheese, plain or whatever you like really.

Enjoy!

Need a gluten free pancake recipe, check out my easy to make amaranth pancakes

Tuesday, February 11, 2014

Spicy honey pumpkin pie recipe, no refined sugar

This is a smooth spicy honey-pumpkin pie. It is of course refined sugar free and simple to make. You do not need many ingredients or much time to whip this up!

  Spicy Honey Pumpkin pie

250 grams/ a cup of (organic) orange pumpkin, seeds removed and cut in small cubes (if organic you do not have to remove the skin) Alternatively you could use the same amount of canned pumpkin.
3 tablespoons honey and 1 for decoration
2 eggs
1/2 teaspoon ground cinnamon (or speculaaskruiden if you know what those are)
1/2 teaspoon ground ginger
1 pack of puff pastry

Wednesday, January 15, 2014

Easy Sugar free nutella recipe with raw cocoa

This super easy sugar free hazelnut spread is great for on bread, pancakes, or just a spoon but not as bad for you as nutella is. It's made with dates, raw cocoa and hazelnuts obviously.
Creamy, yummy and definitely gives you the ability to keep the real nutella for weekends and special occasions!
Easy to spread and eat ;)

This is the hazelnut paste I usually buy

Sugar free nutella hazelnut spread recipe


175 grams ground hazelnut (I buy this in a jar, like you would peanut butter, you could grind your own I would expect, but my food processor is not good enough to try, it needs to be so fine that it releases its oils) 

4 or 5 dates without the pit


Monday, December 30, 2013

Apple beignets / fritters, sugar free, spelt flour

I hope you had a wonderfully delicious christmas and I wish you a happy and healthy new year!

I made theses lovely apple beignets / fritters (difference??) for New Year's  Eve. It uses a quick puff pastry recipe that is not a lot of work and has great results. Apple beignets in the Netherlands are always completely covered in refined sugar which tastes amazing but as I no longer eat it I covered these in Coconut blossom sugar. It gives it a surprisingly slightly spicy taste. Great for a party or when you want to fool yourself that anything apple has got to be healthy somehow :)

Eat them the same day, they will be at their best

Read on for the recipe.

Friday, December 20, 2013

Sugarfree speltflour gingerbread recipe, good for cookies, cakes andhouses!

Amsterdam canal house
It didn't last long...


This is the best gingerbread recipe I have ever tried, sugar free or not. It doesn't rise very much but just enough to make a soft cookie. It is tough enough to build a house with but not so hard that it breaks easy. It has a really yummy taste, though that is my opinion of course (And my family's). It makes a pretty golden cookie and can be used for anything really. I have made a gingerbread house with it, cookies and cake crusts. It is made with spelt flour which contributes to the lightness of the gingerbread and coconut blossom sugar and maple syrup to give it a rich taste.

(I always feel really weird typing sugar free and then saying it contains sugar... I have sworn

Sunday, November 17, 2013

Amazingly scrumptious chocolate pudding recipe almost sugar free

Oh my, I just made the most amazingly scrumptious chocolate pudding! It is based on this recipe by Joy of Baking but as has become my signature thing at the moment, it is almost sugar free. This by the way does not mean it is healthy like veggies or fruit. It just doesn't contain evil refined sugar... instead I have used maple syrup and stevia. Besides not being toxic, it is also dead easy to make! Yay!

Amazingly scrumptious chocolate pudding 

Makes enough for 4 people, it's very filling
Prep time: 1,5 hours including refrigeration

Goodness I need to learn how to make pics of food... Even mickey isn't looking too happy... It tastes much better than it looks, promise!
Ingredients:
- 2,5 tablespoons cornstarch
- 30 grams unsweetened cocoa powder
- 1/4 teaspoon salt
- 100 ml maple syrup
- 1/8 teaspoon stevia (95% steviolglycoside)
- 3 large egg yolks
- 315 ml milk
- 100 ml whipping cream
- 40 grams of dark chocolate in pieces (choose chocolate of good quality)
- 1 teaspoon pure vanilla extract
- 15 grams of butter in pieces


Mix the cornstarch with the cocoa and salt in a heat proof bowl. Mix it really well by scraping the back of the spoon over the side of the bowl until there are almost no lumps of cornstarch left. Add the stevia and the maple syrup and whisk well. Then whisk in the egg yolks until it's a uniform paste. Set aside.

Put the milk and the cream in a saucepan and bring up to boiling point. Take it off the heat and slowly whisk it into the chocolate paste.

Pour the entire mixture back into the saucepan. Cook until it thickens, keep stirring! When it has the thickness of pudding, which it will be really quick, take it off the heat and beat vigorously for a few seconds.

Stir in the butter, chocolate pieces and vanilla extract until well blended.

Pour or scoop it into a clean bowl, press a piece of baking paper over the top and refrigerate for about an hour. (The baking paper will keep it from forming a film and it won't stick.)

After the hour take the bowl out of the fridge, remove the paper and beat vigorously again. Your pudding is now done and ready to eat! Yay!

You can eat it right away or cover it and refrigerate again until needed.


Enjoy!

Thursday, October 31, 2013

What I've been up to including but not limited to baking

Once again I ate a soapy piece of food. Usually this mistake keeps within the cake bake circle of things but today it found its way into my pancakes. I wanted to make a cornmeal pancake of some sort so I searched the internet for a promising recipe. Everything looked fine and tasted great dripping with syrup but a piece on its own had that all too familiar taste of having eating a particularly unnatural bar of soap (though really I have no reference, thank goodness :) You would think I learned from my previous mistakes but while I was adding soda to the batter I did think it was a bit much and did it anyway. My hubby had doubts I didn't make a mistake and looking at the recipe again he was right. It wasn't supposed to be baking soda but baking powder.... grrr. It was a good recipe though, you can see it HERE.

Banana Pumpkin Bread
Luckily a lot of recipes of late worked fine. I made some great pies for my mother-in law including a nice banana pumpkin bread so the baby had something sugarless to snack on. I'll add that recipe later. All the guests on her birthday commented on the nice pies but really I didn't care much because I LOVED them. Both were from Ken Haedrich's book Pie, which as you might know is the best pie book ever! I had chosen a Pumpkin Cheesecake and a Mocha Ricotta as I know my in laws don't like anything too sweet. The Mocha came with a great rich Mocha Chocolate sauce too, yummy!
Left a Pumpkin Cheesecake, Right a Mocha Ricotta
Yesterday we had nice tiny quark cakes, like cheese cake but made with quark (obviously). I also made a great banana bread that I sadly don't have the recipe of. I thought I could remember it but I didn't.

I have also had some non bake related projects going on of which I'll post some pics soon. I've made my baby a cute winter coat. Ever shopped for a day for 1 article of clothing and come back empty handed because they just didn't have your vision? My baby needed a new coat but somehow every girls coat is either pink, too frilly or has texts like "I'm the cutest girl you'll ever see" which is true but not something I want my 1 year old to wear. So I searched through my stash of fabric (which has become surprisingly large) and found a cute purple wool felt. I used it to make a coat for myself a few years ago and thought it would be perfect for her. It's now waiting to have the sleeves shortened and then it will be ready for winter.  

I've also become a web editor for the anthropologists professional association where I hope to become the main contact person for all universities and institutes related to anthropology in my country anyway. Also I get to blog, which is just fun!

Lastly I started restoring one of my oldest dolls today. She's been with me since 1989 and she has soft skin, pretty eyes, curly hair, a cute button nose and sweet dress. Her name is (don't laugh...) Pipi (pronounced pee-pee, I was 5 don't judge ;). Her face was dirty but I didn't know how to clean it, also I had no idea who she was or who made her. So I googled the only terms I could think of: '80's dolls'. And TADA! there she was. Pipi is my My Child doll, produced by Mattel in the 80's. They have quite a hardcore fan club and I have seen some awesome OOAK make over dolls. I found a site that had directions on how to clean her and fix her hair so I did that today. She now sits on the couch in front of the heater to dry.
I cannot believe she is 14 years old. I can still remember standing in front of a huge row of My Child dolls in what must have been a Toys R Us. They had so many different ones, with different skin colors and clothes and hair. The funny thing is all those choices and I did actually choose my child. Pipi is pale and blond in a pretty pink dress. If she's had blue eyes instead of brown she would have been a perfect likeness of my real child.
Pipi is looking nice and clean again with soft hair, but it's not as nicely curled as I've seen in some pictures of restored dolls. I wonder how she looked right out of the box and hope to find some pictures when I'm at my parents tomorrow.


Tuesday, October 1, 2013

2 minute chocolate mug cake, no eggs, no butter

Ever sat on the couch in the evening wishing you could devour a piece of chocolate cake? Now you can! It's quick, easy, not much mess and really good! From searching through your cupboards for ingredients to eating you scrumptious cake takes 10 minutes max. :)

2 minute Chocolate mug cake


What you will need:

- a microwavable mug


- 5 tablespoons of selfraising flour
- 4 tablespoons cane sugar or caster sugar
- 2 full tablespoons unsweetened cocoa powder
- pinch of salt

- 1/2 teaspoon white vinegar
- 1/4 teaspoon pure vanilla extract
- 2 teaspoons vegetable oil (no olive oil, I like to use rice)
- 4,5 tablespoons water

Add the dry ingredients to your mug and mix well. Make an indent in the flour mix and add the wet ingredients. Stir until you have a smooth batter. Microwave on high (800 watt) for 2 minutes. Done!

Top off with powdered sugar, frosting, whipped cream or chocolate chips. Cute to look at, great to eat!

This also makes a really good housewarming, birthday or shower gift. Buy a suitable mug for the occassion, add the dry ingredients. Add some chocolate chips for a decadent touch. Put the wet ingredients in a sealable bag. Make a nice card saying how to make the cake and attach together with the wet ingredients to the mug handel. Wrap in plastic foil and you have a cute, inexpensive gift!

Make it pretty!


Tuesday, September 17, 2013

Upside down pumpkin pear pie recipe

Do you ever wish you were back in middle school when life was easy and it kept you from eating too much and moving too little. I just can't figure out who I want to be and it's driving me mad. Do I want to be 'just' a mommy or do I want a career and if I go for the career how do I juggle my kid and my job in a way that I feel comfortable with. And about that job... what the heck do I want to do and how do I get it. I've been taught my whole life that I can be whatever I want to be if I work hard enough. Sure. I went to university, I traveled a lot as a "poor" student and had a ball. Then I got my degree (eventually) and have stood at a cross roads ever since. When the world is your oyster or whatever, there is just too much choice. It bums me out. So I spent a while watching old home videos which surely didn't make me feel better because my parents were barely 5 years older than I am now and they were already living in a different country for my dad's work. Plus the images remind me of why I actually don't really like living in the Netherlands and would give anything to get my entire family to move to a place where there are still more trees than people and the ground isn't so horribly flat. Could I move thousands of miles away and be happy? Is it worth taking the risk? Be it going or spending a lifetime wishing I lived somewhere else...

 If everyone could click on a banner on this page maybe I'll earn enough doing this not to have to pick and choose ;)

Anyway together with this dilemma I also cut off a flap of skin on the top of my index finger while putting a desk together which makes typing awkward (ever notice how weird that word is?) and completely ruined a batch of muffins because I once again (you would think I would only make this mistake once...) I added too much baking powder making those things taste like soap... yuk.

But you gotta love life for all the things you could do, one being Halloween! They don't really celebrate that here but it's a good reason to make pumpkin treats. I love pumpkin :) I just read it contains almost no vitamins so it's not a great veggie, but hey, it's not unhealthy...

I spend a minute deciding if I would make this pie with pears or apples. I chose pears because I had just bought a new type of pear with red colored flesh. It seemed very Halloweeny. When cutting it up I tried a piece and noticed they were quite tart and not soft at all as you would expect from a pear. If you can't find a pear like this I would suggest using apples instead as the acidity really offsets the sweetness of the rest of the pie.

Pumpkin pear pie


Ingredients:
- 2 tart pears (or 2 tart apples if you wish)
- 2 handfuls of sugar
- 1 can of pumpkin (425 grams) or buy a pumpkin, peel, scoop out the seeds and cook for 10 minutes after which you can puree it easily.
- 3 tablespoons sweetened condensed milk
- 2 eggs
- 1 teaspoon cinnamon
- 1/2 teaspoon ground ginger
- 1/2 teaspoon ground cloves
- 100 grams oatmeal
- 2 tablespoons honey
- 2 tablespoons vegetable oil
- 2 handfuls of almonds, sliced

- Springform (where the sides come off)
- baking paper

Preheat the oven to 180 degrees Celsius.

Peel, core and slice the pears thinly. Put baking paper over the bottom of the springform and then put the rim on. Grease the paper with crisco or some vegie oil. Sprinkle the sugar over it and lay the slices of pear in a nice circle on top. Set aside.

Divide the can of pumpkin over two bowls.
Add 1 egg, the condensed milk and the spices to bowl 1.
Add the other egg, the honey, oil and oatmeal to bowl 2.

Mix both bowls well.

Pour the contents of bowl 1 on top of the pear and use the back of a spoon to smooth it out.
Sprinkle the almonds over the top.

Now add bowl 2 in dollops over the top, and then spread that out carefully with the back of a spoon too. Try not to push it into the other layer.

Bake the pie for 45 minutes in the conventional oven (so no turning the air fan on, that will just dry the whole thing out). After 25 minutes turn the form so the side that faced the back now faced the front of the oven. That's just to get even heating. Test the pie by inserting a knife in the center, if it comes out clean it's done.

Leave the pie in it's form for 10 minutes. Then run a knife around the edge and take the rim off. Take a plate and lay it on top of the pie, use it to turn it over. Peel the baking paper off and tada, done!

I suggest leaving the pie covered in the fridge for a day before eating with some whipped cream. It will give the tastes time to settle and fully immerse themselves in the pie.

Enjoy!


Ps I promised a picture of my daughters winnie the pooh birthday cake but my hubby downloaded it to his computer and erased the card... I'm waiting for him to send the pictures to me.

Monday, August 26, 2013

How to: Black and white Mickey Mouse/Disney cake pops

My mom ordered cake pops but gave me the choice of how they would look. Those are nice orders because I can try out ideas I have without spending too much money on it. Of course I did not charge her for the fact that they weren't all the same and much more work than your standard cake pop, so it's a good deal for both of us (in my opinion anyway). 

I wanted to make black and white Fab 4 cake pops (sorry to me that will never be the Beatles..) with a color accent. Unfortunately I didn't have green or blue fondant in the house so I kept those black and white. I actually like them this way too. I think Donald Duck is very recognizable, Goofy could use a green hat and maybe some ears though.
Mickey would probably have turned out better if his buttons had been red. Wouter didn't recognize him at all, even with Minnie right next to it... Minnie turned out great in my opinion. The heart shaped confetti worked great as a bow. 
I also made these pops with the intention of adding as little sugar as I possibly could. I therefore tried to stay away from buttercream and Candy melts, instead using a sugarfree cake recipe, ganache and chocolate.
It was a good try with fairly satisfactory results!

For those of you who are interested in a more thorough description of what I did, I added a how to here. Otherwise you can stop reading and maybe pin my picture for me :)

HOW TO:

The filling consists of Honey Ginger Cake. I found the recipe on Homemade Baby Food Recipes.com where they also have a lot of other great sugarfree cake recipes.
I had some white chocolate ganache which I had taken out of the freezer the day before. After I crumbled the cake to pieces, I used this to stick it back together. The cake is quite moist on its own and I found that I probably could have rolled satisfactory balls without adding the ganache. Anyhoo... I rolled the mixture into balls which were way too big and then coated them with a bit of wholewheat flour just so they wouldn't be so sticky. I put them into a egg tray with plastic wrap over it and used yellow Wilton Candy melt to stick a lolly pop stick into them. (I used Candy melt because you cannot temper that small amount of chocolate.) I put the tray into the freezer for at least 15 minutes so the pops would be hard and easy to work with (hmmm sounds weird, hard and easy... you get what I mean right?)

While the pops were in the freezer I made the Mouse ears. I used chocolate drops and an apple corer. This made a nice round piece of chocolate that wasn't too thin. I also tempered white chocolate (don't know how? Check here).
I coated all the pops in white chocolate first. A quarter of the pops I put on a piece of baking paper, those were going to be the Goofy's and half I added ears to. Because the pops came from the freezer the ears needed to go on quickly, because the chocolate sets really fast. It's good though because you don't risk the ears falling off before it's set.

I wanted to use the gold balls as in the picture above for Mickey buttons. I had it all set up but then completely forgot to stick them on after dipping. When I remembered the chocolate had long since set. It beats having to draw them on though, so I would definitely do this next time.


After all the pops were dipped in white chocolate I put them in a pop holder thing and put them back in the freezer. Meanwhile I tempered dark chocolate.
Mickey, Minnie and Donald have their top half in dark chocolate and Goofy the bottom, though because his stick is on top what you're doing is the same.

Minnie got two heart shaped confetti candies on top her head and I made the spots on here dress with a lollypop stick dipped in chocolate. That's also how I made the lines on Goofy, though I think I'll use a brush for that next time.
Mickey's buttons are made from yellow Wilton Candy Melt, but as I said before I'll use the gold balls next time.

Goofy's hat and Donald's hat and bow are made from white fondant.

Make it beautiful!


Tuesday, July 9, 2013

How to: Baby painting with 100% natural edible finger paint recipe

For father's day I wanted to have Baby paint her daddy a picture. As she is only 9 months and puts everything in her mouth I figured it would be a good idea to make her some edible paint.

I googled how to make edible finger paint and found a wonderful page which made a good paste which tastes disgusting and gave me a good idea of what to do with it. To me it seemed smart to have a yucky taste as I really didn't want Baby to try and like it. However the recipe did use chemical food coloring and I am not a big fan of those. I already knew how to make food, which has a base of fat (like butter), naturally yellow, with curcuma/turmeric/curcumin powder. It's yellow powder made from the root of the curcumin and you can find it at your local supermarket in the spice rack. However I really didn't know how to make the rest of the colors.

I used a page which I cannot find anymore, figures... But it had two ways of making natural food coloring, by juicing or boiling. This great article basically says the same and more:

http://www.networx.com/article/8-ways-to-make-organic-diy-food-coloring

It also links to this blog which has lots of diy natural food dyes.
http://itsybitsyfoodies.com/natural-buttercream-frosting-dyes/

I made the finger paint substance first and colored it later, as the recipes suggest. This however left me with very drab colors because I just couldn't add enough natural food coloring without ruining the paint. Therefore this recipe combines the two. The only downside is that it makes quite a lot of each color.
Do take into account that these colors are always going to be quite pastel.

The red in my picture was made with berries and completely disappeared when Baby painted with it, so I recommend beets.


All colors are true except the purple which I made with wilton food coloring.

100% natural edible finger paint, especially great for babies

Colors and corresponding juices:

- Pink/red: beet juice (can come from a can of beets) or you can pulverize raspberries in a blender and strain out the liquid. 

- Green: Spinach juice or just spinach pureed with water UPDATE: I would use wheat grass powder for this now, it's very vibrant even in small quantities and the plus side: it tastes grassy and not particularly good.

- Orange: carrot juice

- Purple: Cook a red cabbage until the water is very dark or use grape juice.

- Blue: Cook a red cabbage until the water is very dark and then stir in baking soda, a little at a time until the water turns a pretty blue hue or pulverize black or blueberries and strain the liquid.

- Yellow: turmeric powder, found in the spice section of the supermarket, (this works great but I have found that it darkens over time)

You can also make brown by straining a few black tea bags, or coffee, or adding cocoa powder to water. But I DO NOT recommend this for babies. It will contain a whole lot of caffeine and you don't want your baby eating that.

1/4 cup cornstarch
1 1/4 cup juice for the color you need, see above
Unflavored gelatin, check the package to see how much you need
1/4 cup cold water

Mix together gelatin and water and set aside.
Cook cornstarch mixture over medium heat, stirring constantly, until it boils. It’ll become thick as you’re stirring.
Remove from heat and stir in the gelatin mixture.
Pour into smaller containers and let cool.


I bought a canvas board and taped the letter of Baby's name on it. I dropped dabs of different colors around the board and put her on it. She then had a blast painting it. I turned the board a few times so she got all sides. I had a little baby pool standing by to put her in afterward because she painted herself too :)
When the paint was dry I pulled the letters off making it a very pretty picture for her daddy on daddy's day.


I'm not sure if it will keep because of the natural food coloring but right now it's doing ok. I think it turned a little darker over the course of 4 weeks. It might be better to make a good picture of it just after it's made so you have that if it does go bad.

UPDATE: 6 months later and it is still ok. I'm looking at the real painting right now and just comparing with the picture above: I think it is slowly fading probably due to sunlight. That seems logical to me so I stand by what I say above, make a picture!
Also my niece has told me numerous times that she thinks it is ugly, lol :) Luckily I don't.


Friday, June 21, 2013

Cream cheese frosting, made easy

Recipe of the week


Cream cheese frosting 
enough to top a small pie

Ingredients:

75 grams of cream cheese
50 grams margarine, room temperature
80 grams powdered sugar

Make sure the margarine is really at room temp otherwise you'll get lumps. Margarine tends to be a lot more solid at room temp than butter which is why I use it for this frosting. Something needs to hold it up with all the mushy cream cheese!

Put the margarine in a bowl and mix until it's light and fluffy.
Put the cream cheese in and add the sugar too. Mix another 5 minutes.
Keep the frosting in the fridge until needed.

You can top your cake or cupcakes by using a piping bag or just dollop it on with a spoon as I did in the picture.


Easy right!

Enjoy :)

Wednesday, June 19, 2013

My grandmother's pancake pie - easy and delicious

So last Friday I delivered my very first wedding cake. It was amazing if I do say so myself. Four tiers, carrot cake, champagne butter cream and fondant decoration. Luckily the bride and groom thought it was gorgeous and delicious too which is what matters in the end. Lots of the guest gave great comments also, check out the picture below to form your own opinion :)

I did find out that making wedding cakes takes a lot of time and a lot of material. I ended up charging way too little but as it was the first ever, that was ok.

Anyway, with all that work comes little time for other things so my dad baked me a pancake pie using my grandmothers recipe. He figured that I would have something to blog about without the work! Do I have an awesome dad or what?

This recipe refers to a Dutch Pancake Pie which to Americans and many other people probably, will look more like a crepe pie. The pancakes are thin and a little different so I'm just going to give the recipe for those as well. I'll blog it separately so check it HERE.

Grandma's Pancake Pie


Materials
- Pancakes (see recipe here)
- Jam, your favorite flavor(s)
- Instant custard and the ingredients you need to make it
- OR just use ready to use custard if they sell that where you live
- OR make your own custard if you feel up to it

You need to make the pancakes first. After that, go ahead and make your custard. It has to be a pudding. I'm not sure if instant custard is the same everywhere so you'll have to check the package to see how to make it.
It's easiest if you use your custard while it is still runny.

Now comes the super easy part:

Take a pancake and put it on a large plate with an edge. Pour some custard on it, or if using ready made just smear on there. Take another pancake and put it on top. Smear jam on that one and cover with another pancake. Now repeat until you have enough custard left to pour over your entire cake. (skip this part if using ready made custard) Pour the last bit over the top when it has congealed a little.

Let the cake stand until it has cooled and then pop it in the fridge.When it's cool dust some sugar over it and you're good to go :)

The wedding cake :)
 Make it beautiful!
Related Posts Plugin for WordPress, Blogger...